Approach & Discussion
Method overview
Segmentation
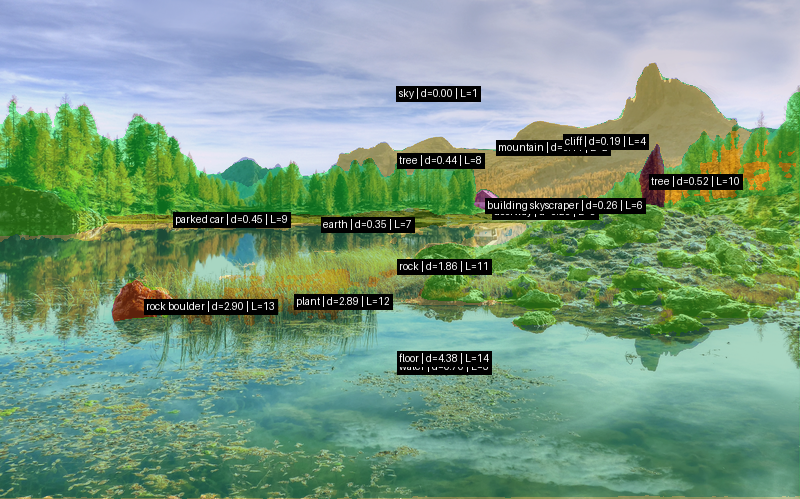
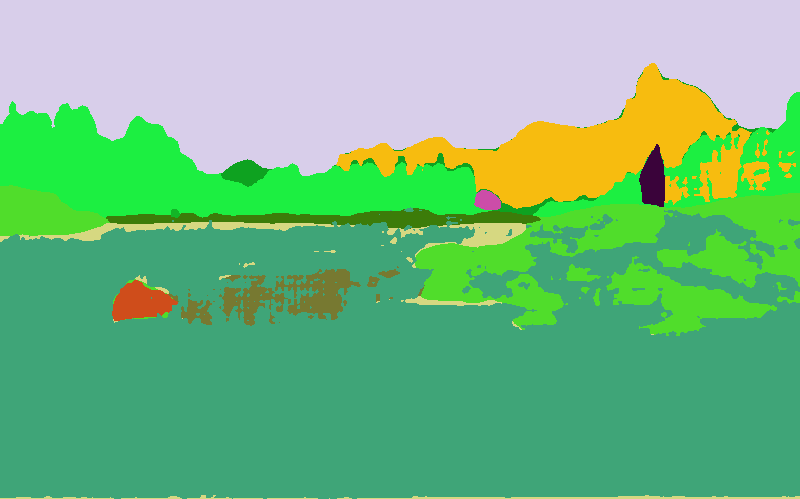
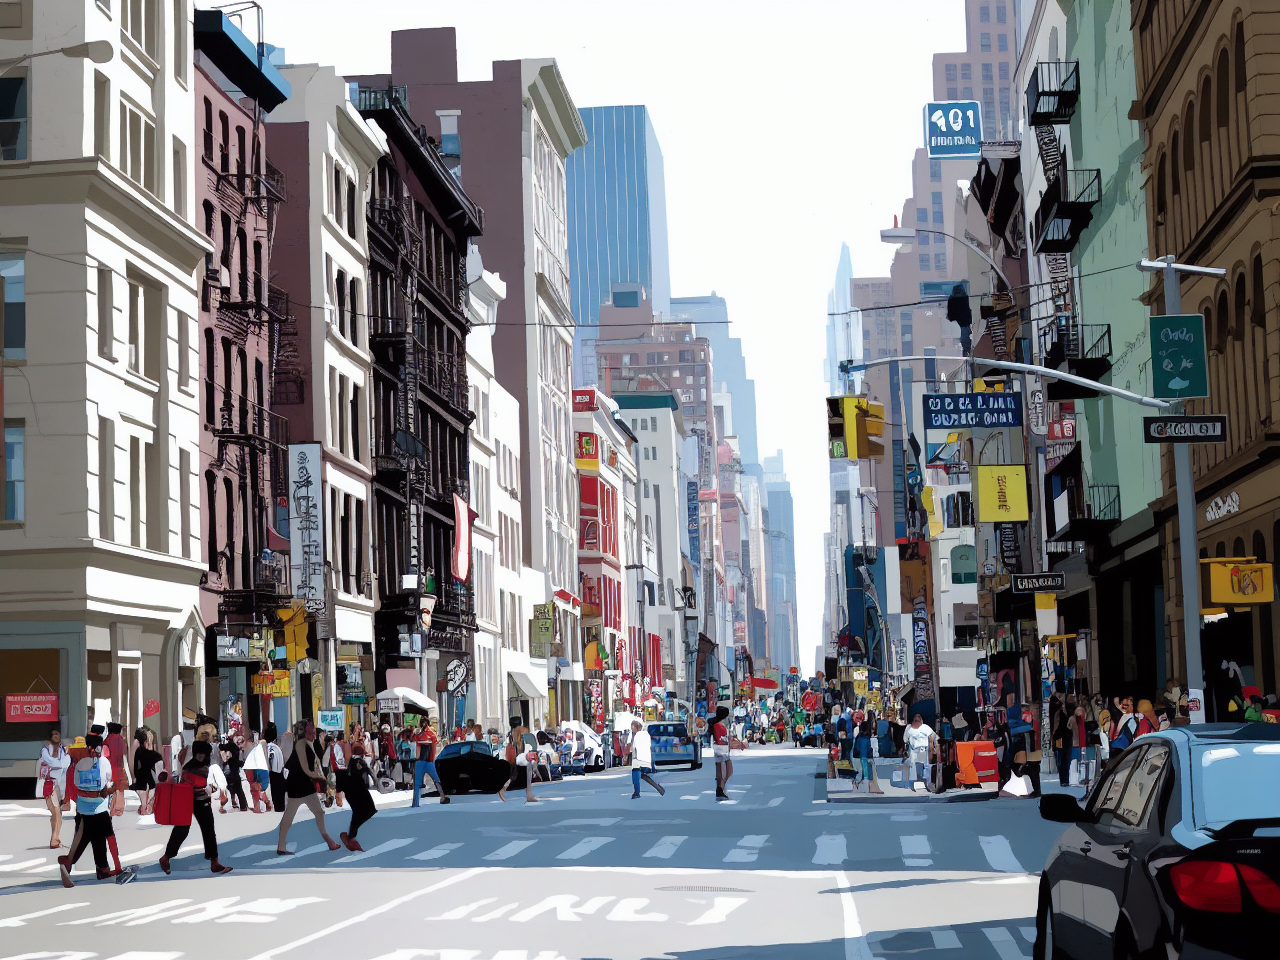
Our scene's are analyzed as a layered segmentation pipeline. First, the input image is resized to a manageable size and passed through GroundingDINO using a text prompt of object categories that are useful for hiding Waldo, such as buildings, trees, cars, poles,signs, and people. The prompt is kept small focusing on common objects to save on compute time. GroundingDINO returns bounding boxes for these detections. The boxes are then used as prompts for SAM, which converts each detection into a binary mask.
The masks from GroundingDINO/SAM alone do not cover large scene regions such as sky, ground, mountains, and roads. sS the pipeline also runs SegFormer-B5 trained on ADE20K. The semantic segmentation output is filtered by a fixed set of class queries similar to GroundingDINO, producing broad region masks for the rest of the scene. Any semantic pixels already claimed by SAM instance masks are removed so that the final masks do not overlap, letting SAM masks have priority. Finally, Depth Anything V2 estimates a monocular depth map. Each mask is assigned the median depth of its pixels, adjusted with class priors that push sky, mountains, buildings, and water toward background layers. Sorting these masks by depth produces the layer map used later for placement and occlusion.
Placement
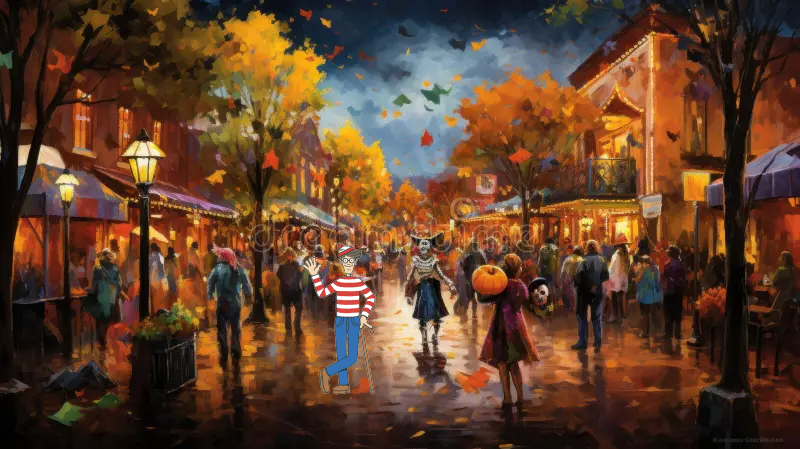
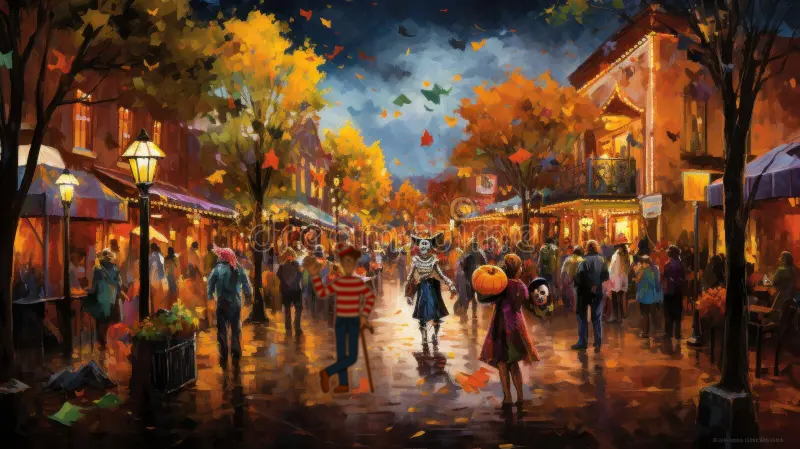
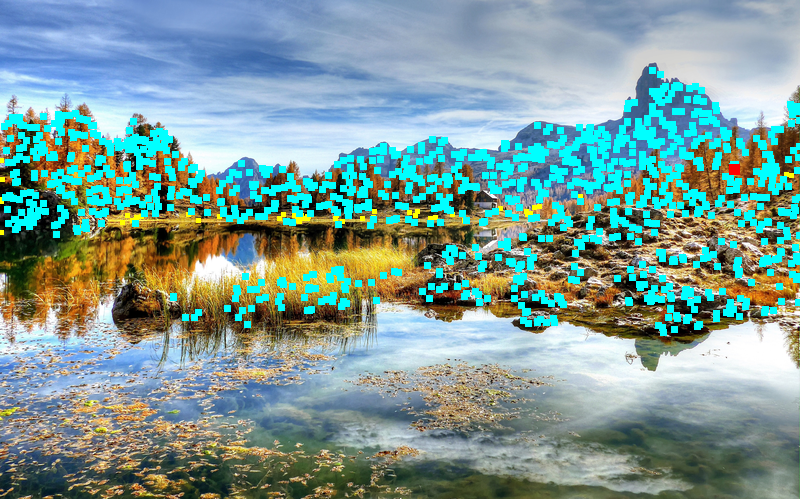
Placement uses the segmentation outputs to choose a location for Waldo that is plausible and findable. The algorithm first builds a support mask from preferred classes such as ground, road, cliff, building, and sign, while forbidding sky and water. It then samples 1200 candidate foot positions from this region. For each candidate, the depth map determines Waldo's scale. Farther regions place a smaller Waldo and nearer looking regions place a larger one with appropriate bounds.
Candidates are tested with multiple Waldo rotations. The code checks Waldo's layer from the layer map, builds an occlusion mask from objects in front of that layer, and rejects placements that hide too much of Waldo. A head visibility check prevents the most recognizable part of Waldo from being fully obscured. Remaining candidates are scored using image position, depth, desired occlusion amount, local texture complexity, head visibility, and a small rotation penalty. We prefer slightly lower image positions to avoid the sky, noisy areas to increase difficulty, depth bounds for difficulty, and occlusion amounts for difficulty and feasibility. The best scoring group is randomized slightly by selecting from the top candidates, which avoids similar type placements while keeping the result within a desired difficulty range. The debug image shows sampled candidates in yellow, valid candidates in cyan, and the selected placement in red.
Stylization
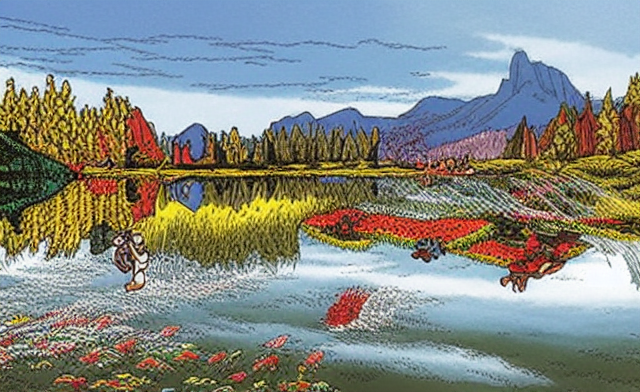
The stylization stage aims to transform the input scene into a visual style closer to a Where’s Waldo? puzzle while preserving the original scene layout for later placing and blending the character. We experimented with three stylization pipelines.
Pipeline A used a diffusion-based approach with Stable Diffusion Img2Img, ControlNet Canny, and a merged Where’s Waldo style checkpoint. The image was first resized, then converted into a Canny edge control image, which was used to guide the diffusion model during stylization. This approach produced strong stylistic changes and could generate a more illustrated appearance, but the diffusion effect was often too heavy. In many cases, it altered the original scene too much, introduced unstable details, and made the result less reliable for our downstream pipeline.
Pipeline B avoided diffusion entirely and used a classical non-photorealistic rendering approach. It applied bilateral filtering to smooth the image, k-means color quantization in Lab color space to create flat poster-like regions, and Canny edge detection to overlay dark line art. This method was deterministic, lightweight, and produced clean boundaries, but the visual result was too simplified. The output mainly looked like flat color blocks with outlines, lacking the richer hand-drawn texture and visual density expected from a Where’s Waldo-style puzzle.
Pipeline C combined the strengths of the previous two approaches. Instead of using Canny edges, it used a SoftEdge ControlNet with PidiNet to generate a softer structural control map. Before diffusion, the input image was resized and lightly smoothed with bilateral filtering. The SoftEdge map then guided Img2Img generation using the same Where’s Waldo-style checkpoint. Compared with Pipeline A, this produced a more stable transformation because the soft-edge control preserved the overall layout without forcing harsh edge structures. Compared with Pipeline B, it created a more natural illustrated appearance with richer details and a stronger storybook-like quality. A mild post-processing step was also applied to adjust sharpness and color after generation.
The final implementation therefore uses Pipeline C. In practice, it provided the best balance between stylization quality and structural preservation. Pipeline A was visually interesting but too diffusion-heavy and unstable; Pipeline B was efficient and clean but too flat; Pipeline C produced the most coherent Where’s Waldo-like result while keeping enough scene structure. Its default configuration uses a relatively conservative Img2Img strength and ControlNet scale, which helps avoid over-transforming the scene while still giving it an illustrated puzzle aesthetic.
Blending
The blending stage aims to integrate Waldo into the target scene in a visually coherent manner by adapting his appearance to the local image context and ensuring a seamless transition at object boundaries. Starting from a predefined position and scale, Waldo is first resized and placed into the scene, and his alpha mask is extracted to define the visible region. To reduce visual inconsistencies, a local appearance adaptation step is applied: color and brightness are matched to the surrounding background patch by aligning per-channel statistics, followed by sharpness and noise adjustments to ensure consistency in image quality and prevent Waldo from appearing overly crisp or artificially clean. After these adaptations, the final composition was evaluated using different blending techniques. We first experimented with alpha blending using a feathered mask, which can create smooth transitions at object boundaries, but in some scenes it made Waldo appear too transparent and reduced his visual clarity. We also tested Poisson blending, a gradient-domain method that enforces consistency of intensity changes between the foreground and background. While Poisson blending can produce natural results for Waldo some of the time, it often led to undesired outcomes in our setting, such as reduced contrast and partial loss of Waldo’s characteristic patterns. Due to this variability, we ultimately chose a more straightforward and robust approach based on local color, brightness, sharpness, and noise adjustment, followed by direct compositing. This preserves Waldo’s recognizability while still adapting his appearance to the surrounding scene.